Usage
Quick Start - Process Images with InsectSAM
To use InsectSAM on your dataset, you can follow this script that demonstrates how to load the model, process images, and get the results in an output folder. The script uses the Hugging Face Transformers library and PyTorch:
InsectSAM Script in RB-IBDM's GitHub
Installation and Setup
To begin using InsectSAM, you'll need to install the necessary dependencies and download the model from Hugging Face. Follow these steps:
-
Clone InsectSAM model repository - https://huggingface.co/martintmv/InsectSAM:
git lfs install # Install git-lfs if you haven't already (https://git-lfs.com)
git clone https://huggingface.co/martintmv/InsectSAM -
Create a virtual environment with conda or venv and install the required dependencies. Always use a virtual environment to manage dependencies. A virtual environment helps to keep dependencies required by different projects separate by creating isolated Python virtual environments for them. Links to conda and venv.
python -m venv insectsam-env
source insectsam-env/bin/activate
pip install -r InsectSAM/requirements.txt
The
requirements.txtfile contains:transformers # Hugging Face Transformers library
torch # PyTorch
opencv-python # OpenCV
Pillow # Python Imaging library
numpy # NumPy
requests # HTTP library
matplotlib # Plotting library
jupyterlab # JupyterLab for running notebooks -
Set up the InsectSAM model:
from transformers import AutoModelForImageSegmentation, AutoProcessor

model = AutoModelForImageSegmentation.from_pretrained("martintmv/InsectSAM")
processor = AutoProcessor.from_pretrained("martintmv/InsectSAM")
Tip: Use this Jupyter Notebook - Run InsectSAM using Transformers 🤗
Once you have the model set up, you can start using it to perform semantic segmentation on insect images. Here's a quick example to get you started:
-
Load the model and processor:
import torch
from transformers import SamModel, SamProcessor

device = "cuda" if torch.cuda.is_available() else "cpu"

processor = SamProcessor.from_pretrained("martintmv/InsectSAM")
model = SamModel.from_pretrained("martintmv/InsectSAM").to(device) -
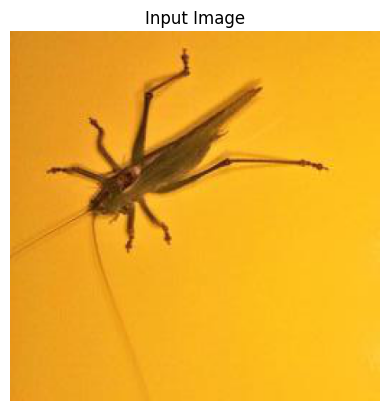
Load an image:
from PIL import Image
import requests

url = "URL_TO_YOUR_IMAGE"
image = Image.open(requests.get(url, stream=True).raw)

# Display the image
import matplotlib.pyplot as plt

plt.imshow(image)
plt.title("Input Image")
plt.axis("off")
plt.show() -
Generate a bounding box for the image:
def get_bounding_box(image):
    # Simulate a bounding box in the center of the image
    width, height = image.size
    x_min, x_max = width // 4, 3 * width // 4
    y_min, y_max = height // 4, 3 * height // 4
    return [[[float(x_min), float(y_min), float(x_max), float(y_max)]]]

input_boxes = get_bounding_box(image) -
Prepare inputs for the model:
inputs = processor(image, input_boxes=input_boxes, return_tensors="pt").to(device)
for k, v in inputs.items():
print(k, v.shape) -
Perform segmentation:
with torch.no_grad():
outputs = model(**inputs, multimask_output=False) -
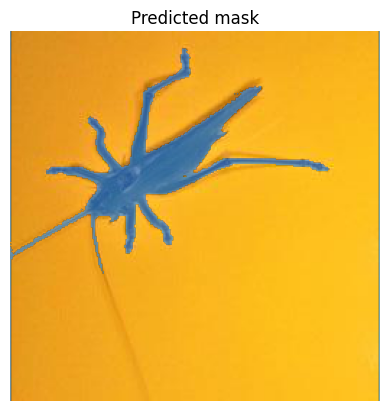
Post-process and visualize the results:
# Apply sigmoid
insectsam_seg_prob = torch.sigmoid(outputs.pred_masks.squeeze(1))
# Convert soft mask to hard mask
insectsam_seg_prob = insectsam_seg_prob.cpu().numpy().squeeze()
insectsam_seg = (insectsam_seg_prob > 0.5).astype(np.uint8)

def show_mask(mask, ax, random_color=False):
    if random_color:
        color = np.concatenate([np.random.random(3), np.array([0.6])], axis=0)
    else:
        color = np.array([30/255, 144/255, 255/255, 0.6])
    h, w = mask.shape[-2:]
    mask_image = mask.reshape(h, w, 1) * color.reshape(1, 1, -1)
    ax.imshow(mask_image)

fig, axes = plt.subplots()
axes.imshow(np.array(image))
show_mask(insectsam_seg, axes)
axes.title.set_text("Predicted Mask")
axes.axis("off")
plt.show()
Example Inferences
Here's an example of how the model segments an image with the code from above and from here.
 |  |
|---|
Further Reading
To dive deeper into the capabilities and advanced usage of InsectSAM, refer to the following resources: